
Platform Partner Onboarding Flow
Let brands set up their own Lumanu workspace from a self-serve onboarding link you create with the API, and match the new workspace to your records with the workspace.created webhook.
Who is this for?Platform partners integrating with Lumanu. This article describes what your brands experience when they self-sign up for a Lumanu workspace through your integration.
Overview
When a brand on your platform needs a Lumanu workspace, you generate a self-signup link from within your app and share it with them. The link opens a co-branded onboarding experience hosted by Lumanu that walks the brand through creating a workspace, agreeing to terms, creating a user, and connecting their account back to your platform.
The flow is resumable once the workspace exists. The workspace is created when the brand submits the Setup Lumanu User step; if they leave after that, reopening the same link (on any device) takes them back to where they stopped. Details entered in the earlier steps are not saved until then, so a brand who closes the page before that step starts the form again.
Creating a Link
Each link is for one brand and creates at most one workspace. You can create links two ways.
With the API
Call Create Workspace Onboarding Invite with your application's access token:
curl -X POST https://api.lumanu.com/api/rest/workspace/onboarding-invite \
  -H "Authorization: Bearer $ACCESS_TOKEN" \
  -H "Content-Type: application/json" \
  -d '{
    "application_id": "a3c1e8f2-6b4d-4f0e-9c7a-2d5b8e1f4a60",
    "idempotency_key": "customer-4821",
    "redirect": "https://app.example.com/integrations/lumanu/connected?account=4821"
}'{
"id": "0b6e5c1a-8f3e-4d43-b1a4-5a8e1f7c9d02",
"onboarding_url": "https://app.lumanu.com/public/partner-onboarding?onboardingInviteId=0b6e5c1a-8f3e-4d43-b1a4-5a8e1f7c9d02"
}Lumanu does not email the link. Send onboarding_url to the brand yourself, or open it for them from your app.
- Use one
idempotency_keyper brand, such as your own account ID for them. Calling again with the same key returns the same link, so retries are safe and one brand never gets two links by accident. Use a new key only when you want a new link. redirectis optional. When set, the brand sees a "Return to{Your Platform Name}" button once their workspace is created. Lumanu opens the URL exactly as given, so put anything you need to recognize the brand in the URL itself.- Treat the link as a secret. Anyone who opens it can create the workspace. Links do not expire on a timer; a link stops creating workspaces once a workspace has been created through it, when you delete it before it is used, or if self-serve onboarding is turned off for your application.
Self-serve onboarding must be enabled for your application before you can create links; until then requests return 403. Contact your Lumanu representative to enable it and to agree your partner funding fee rate.
From the Developer Dashboard
In the Lumanu developer dashboard, open Workspaces → Onboarding links and choose Create link. You can set an optional return URL, copy the link, see each link's status (pending, workspace created, completed, expired) and the workspace it created, and delete a link that has not been used yet. Each click creates a new link; dashboard links do not use idempotency keys.
Co-Branding
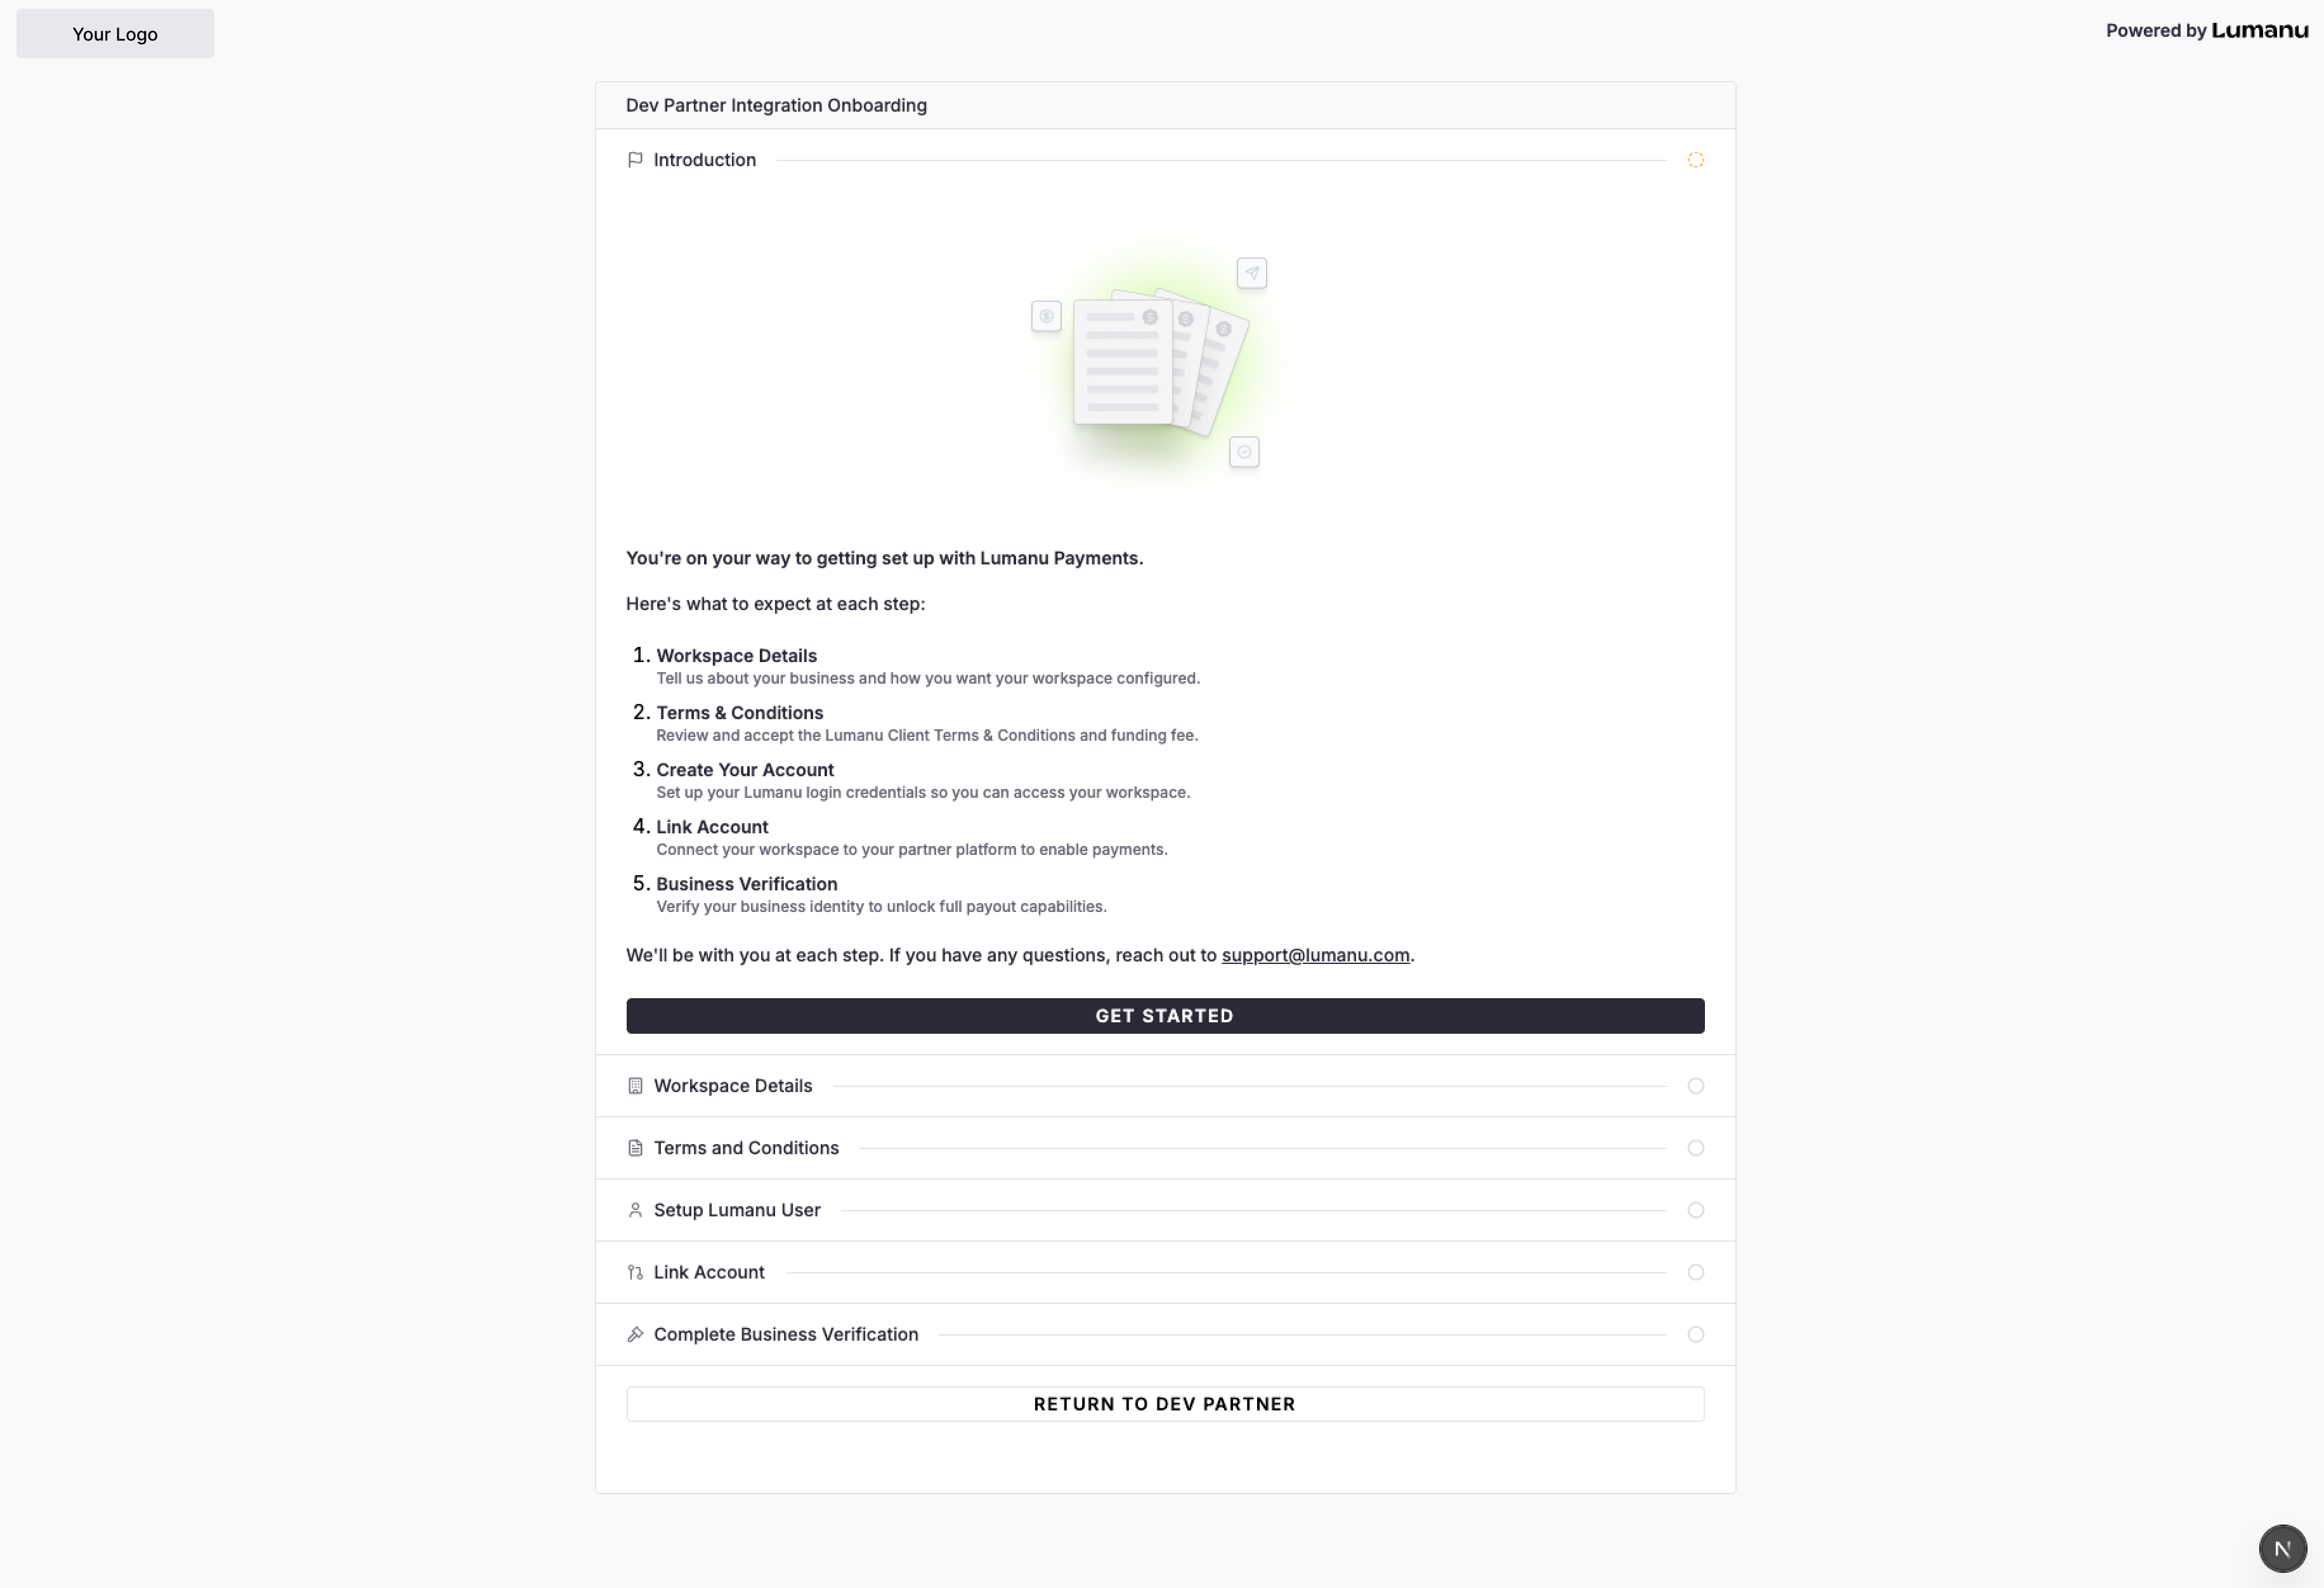
Every screen in the flow is co-branded with your platform:
- Your logo appears in the top-left header slot.
- "Powered by Lumanu" appears in the top-right.
- The onboarding title reads "
{Your Platform Name}Integration Onboarding" (e.g., "Dev Partner Integration Onboarding"). - The workspace-name field is pre-prefixed with your platform name (e.g.,
Dev Partner + [workspace name]) - If the link has a return URL, a "Return to
{Your Platform Name}" button appears once the workspace is created, so the brand can go back to your app. Before that, the footer offers Go to Lumanu only.
Step 1 — Introduction
A welcome page that sets expectations and lists what's coming. The brand sees the full stepper on arrival:
- Workspace Details
- Terms & Conditions
- Setup Lumanu User
- Link Account
- Business Verification
Step 2 — Workspace Details
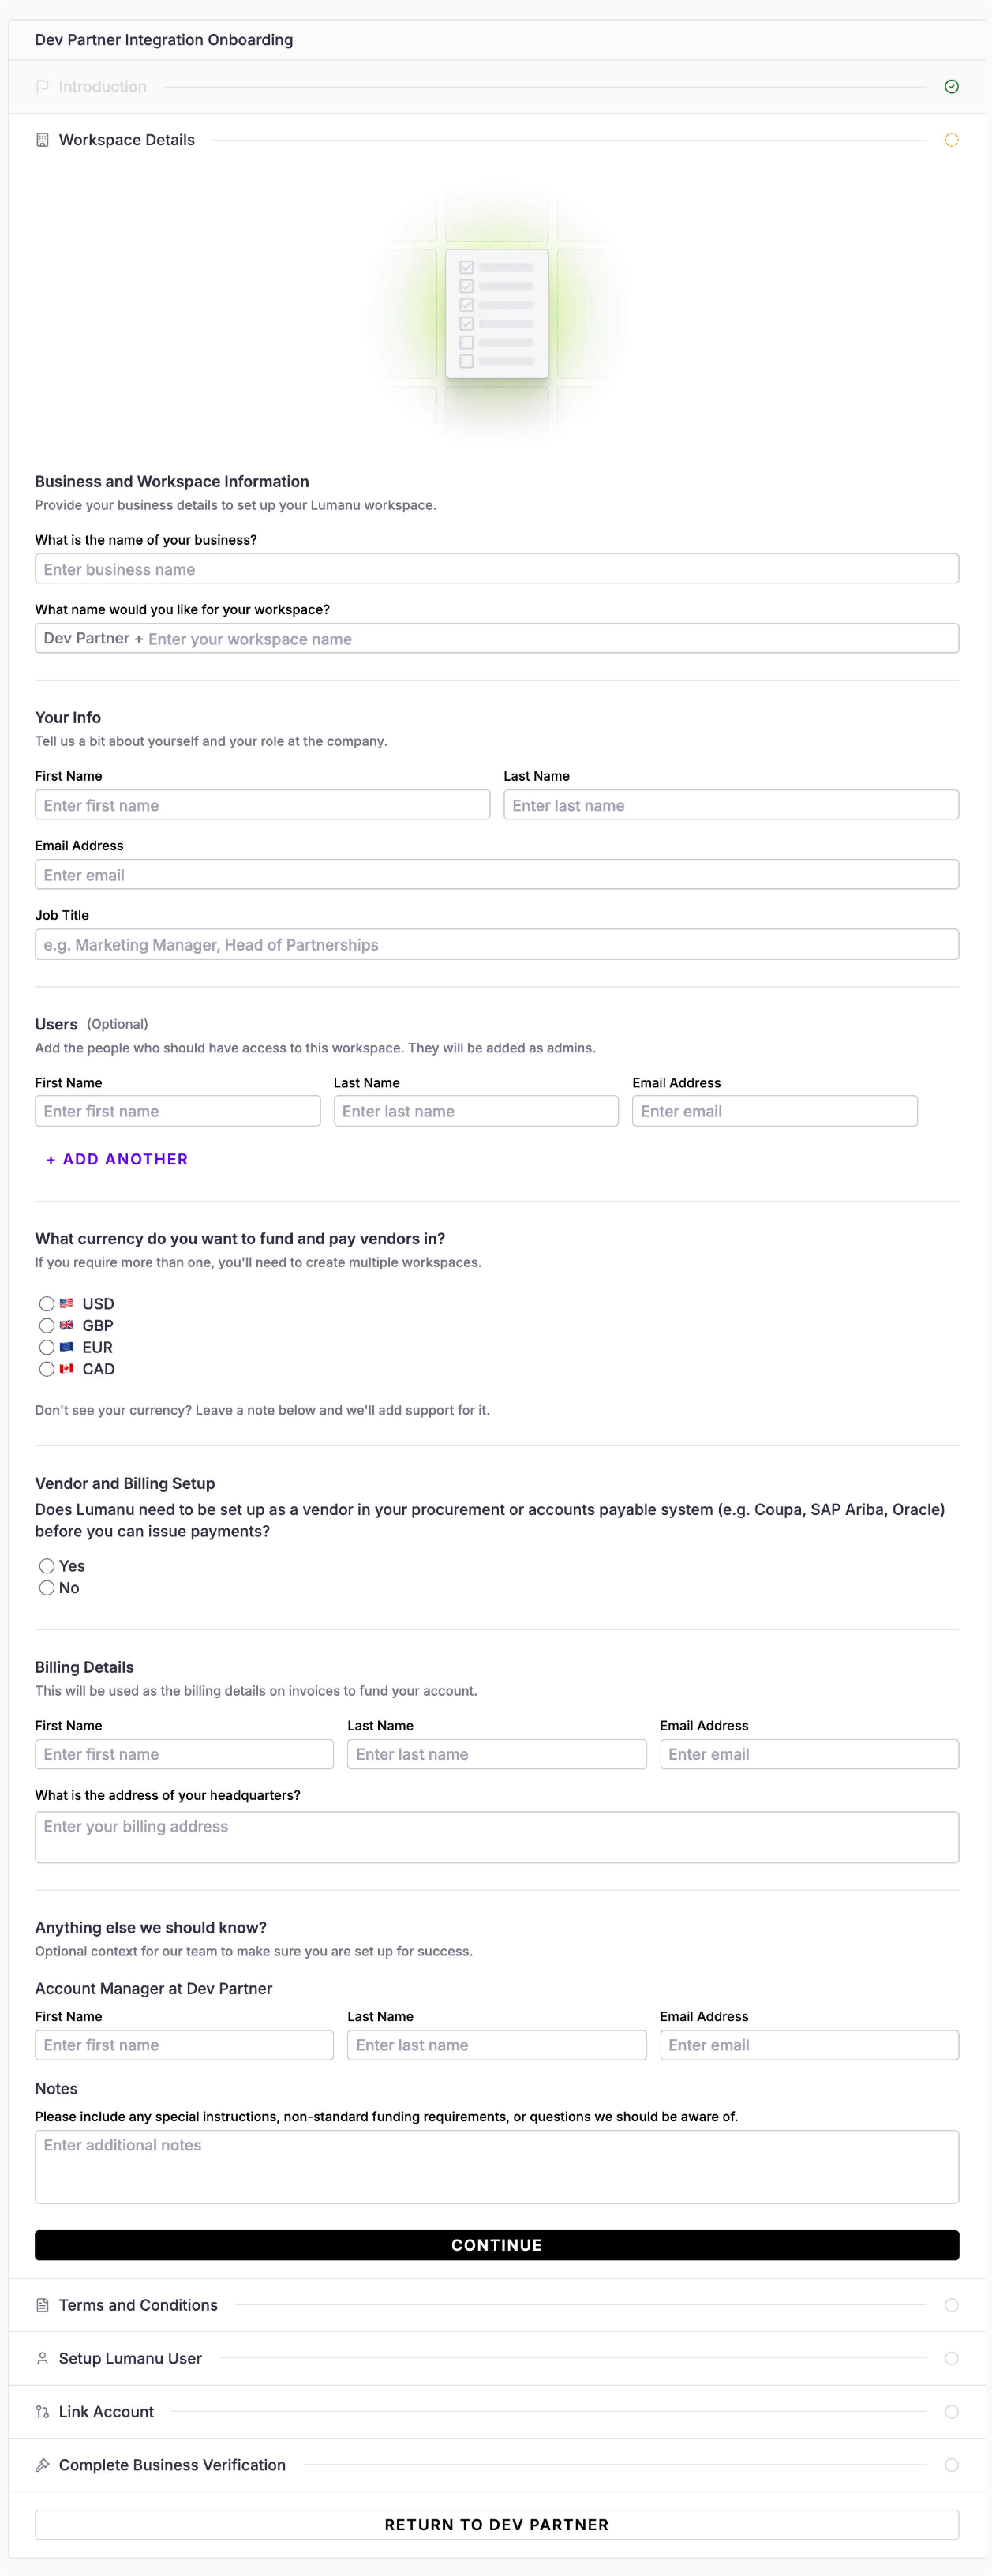
The brand fills in the key details needed to create their workspace:
- Business and workspace info — legal business name and their chosen workspace name (which will be prefixed by your platform name).
- Primary user info — first name, last name, email, job title.
- Additional users (optional) — any teammates they want added as admins at the same time.
- Funding currency — one of USD, GBP, EUR, CAD. A workspace is single-currency; multi-currency setups require multiple workspaces.
- Vendor/billing setup — whether Lumanu needs to be registered as a vendor in their procurement system (Coupa, SAP Ariba, Oracle, etc.) before they can fund.
- Billing contact and HQ address — used on invoices for funding the account.
- Optional notes and account manager — the brand can flag their account manager at your company plus any special instructions.
Step 3 — Terms and Conditions
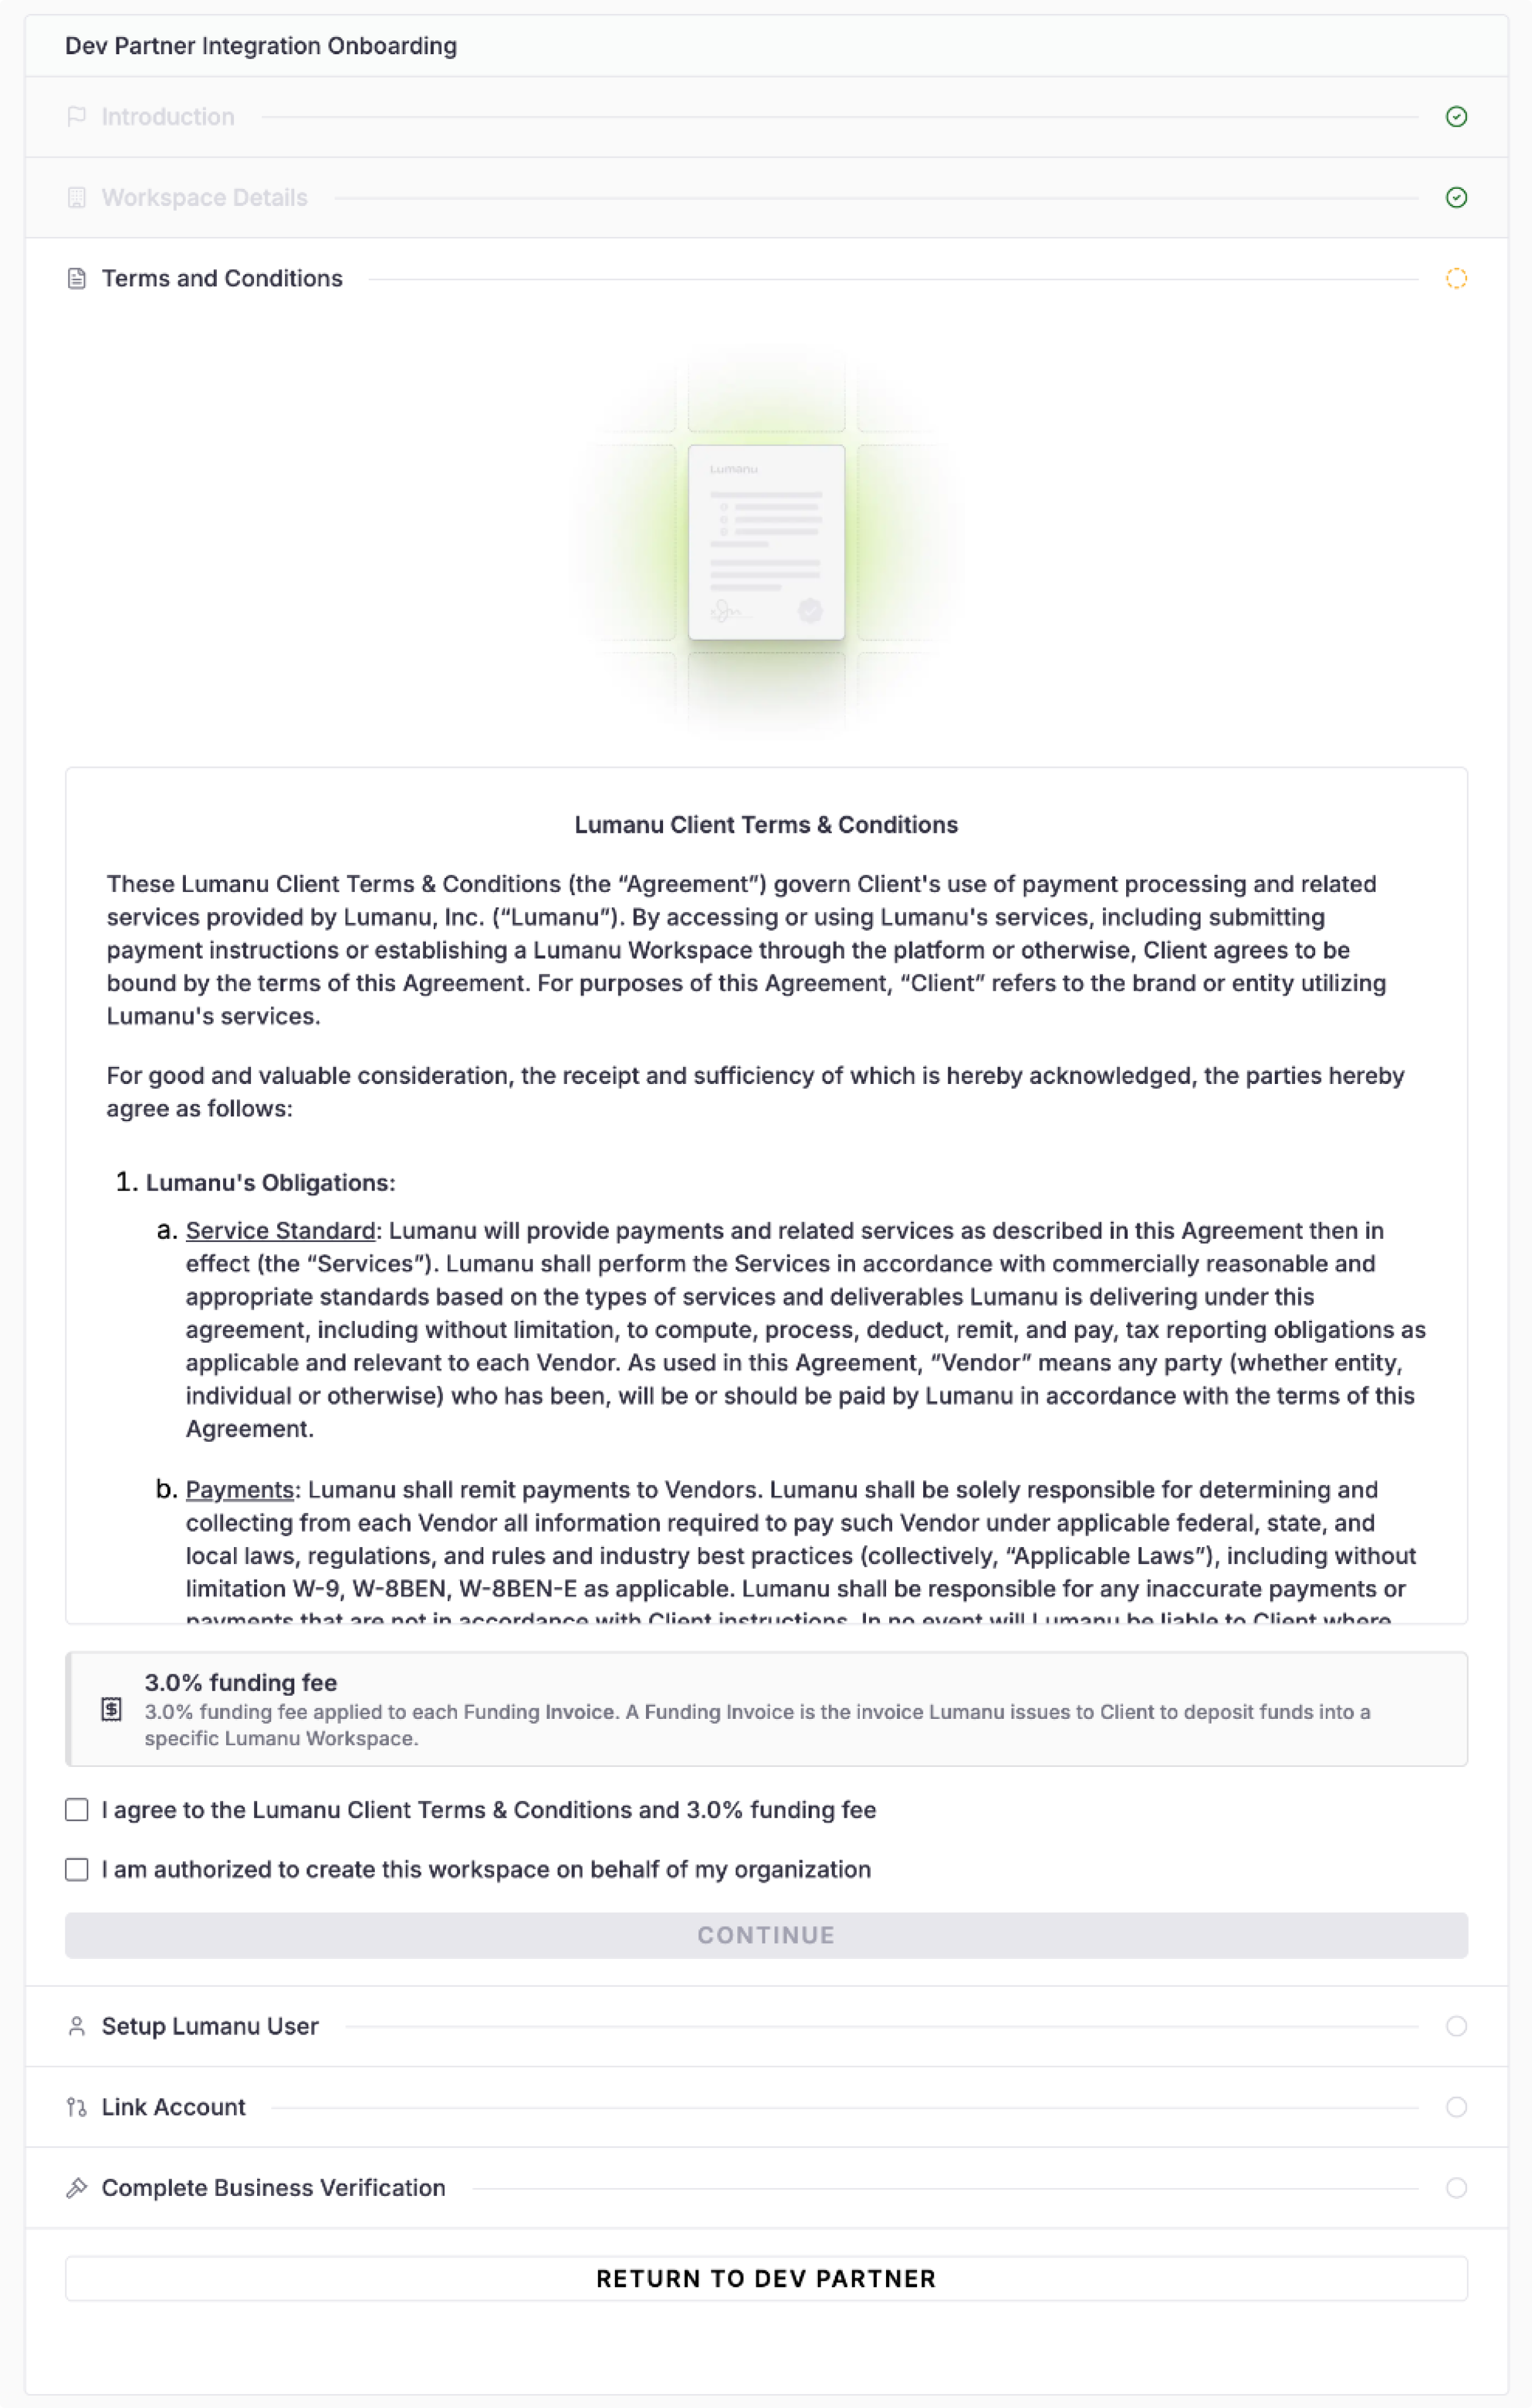
The brand reviews and accepts:
- Lumanu's standard client Terms & Conditions, and
- The funding fee rate you (the platform partner) have negotiated as the standard for your brands.
Because the rate is tied to your partnership, brands onboarding through your link see the same rate by default without needing a custom quote.
Step 4 — Setup Lumanu User
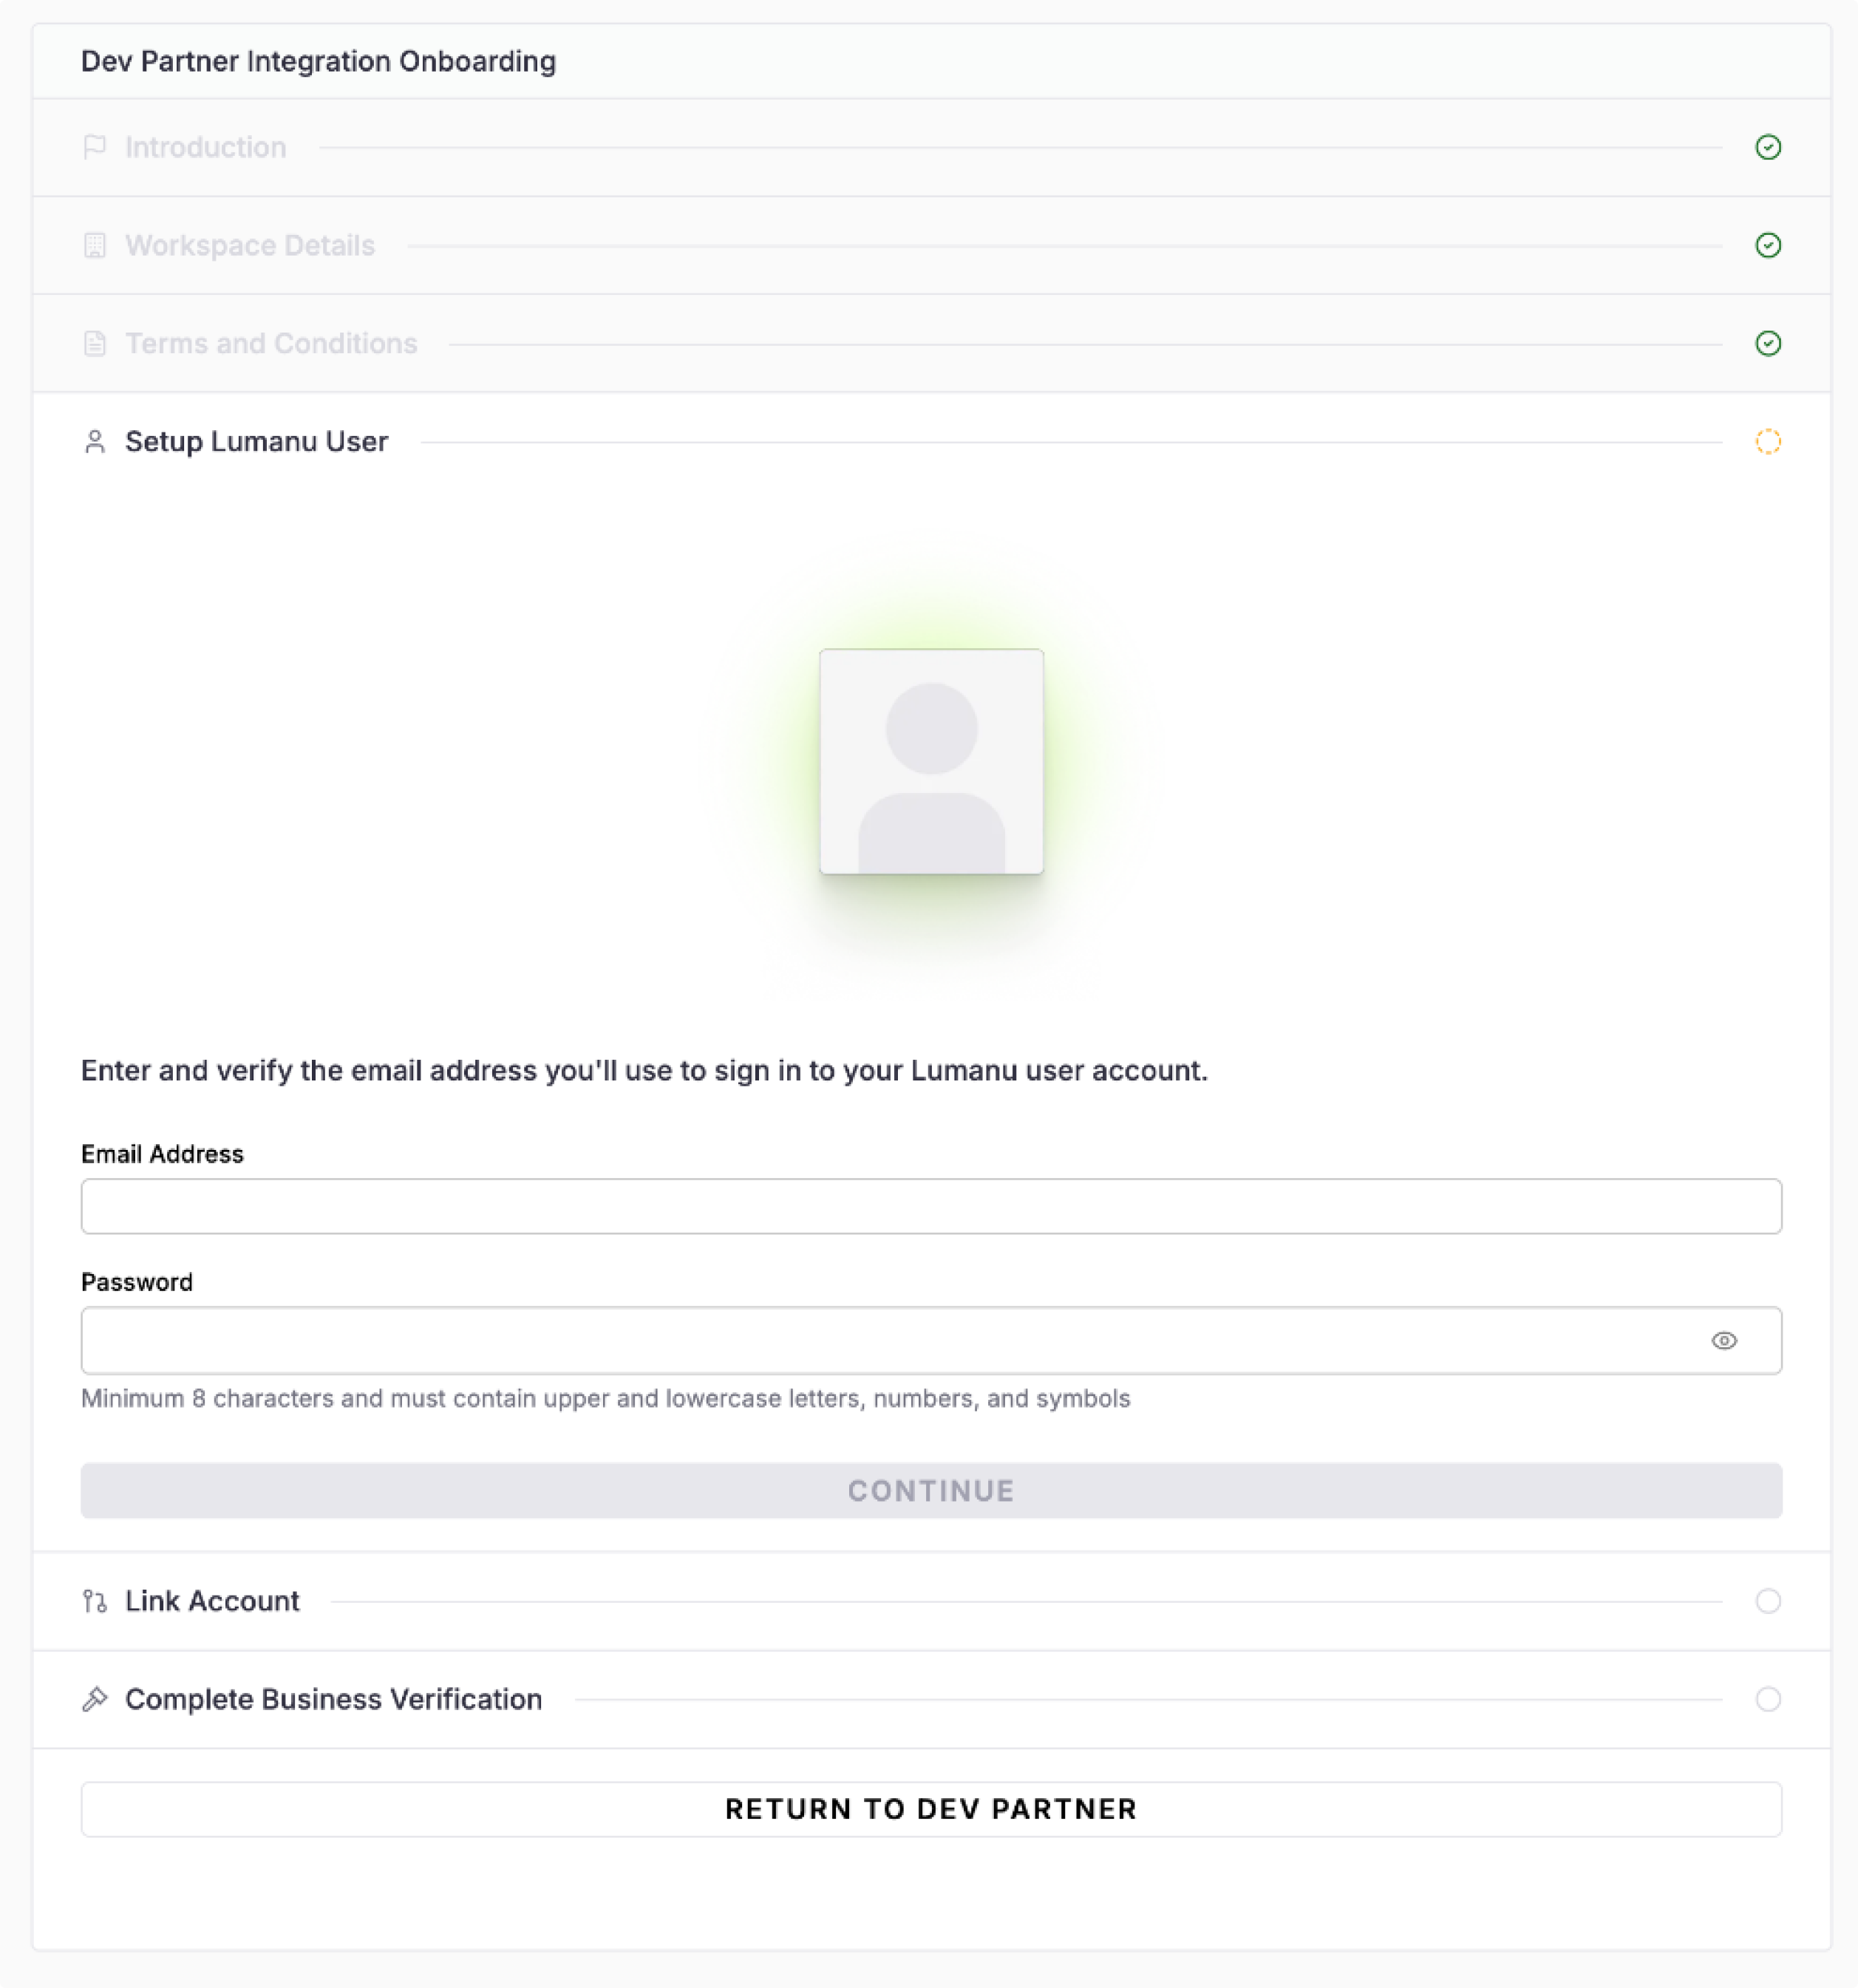
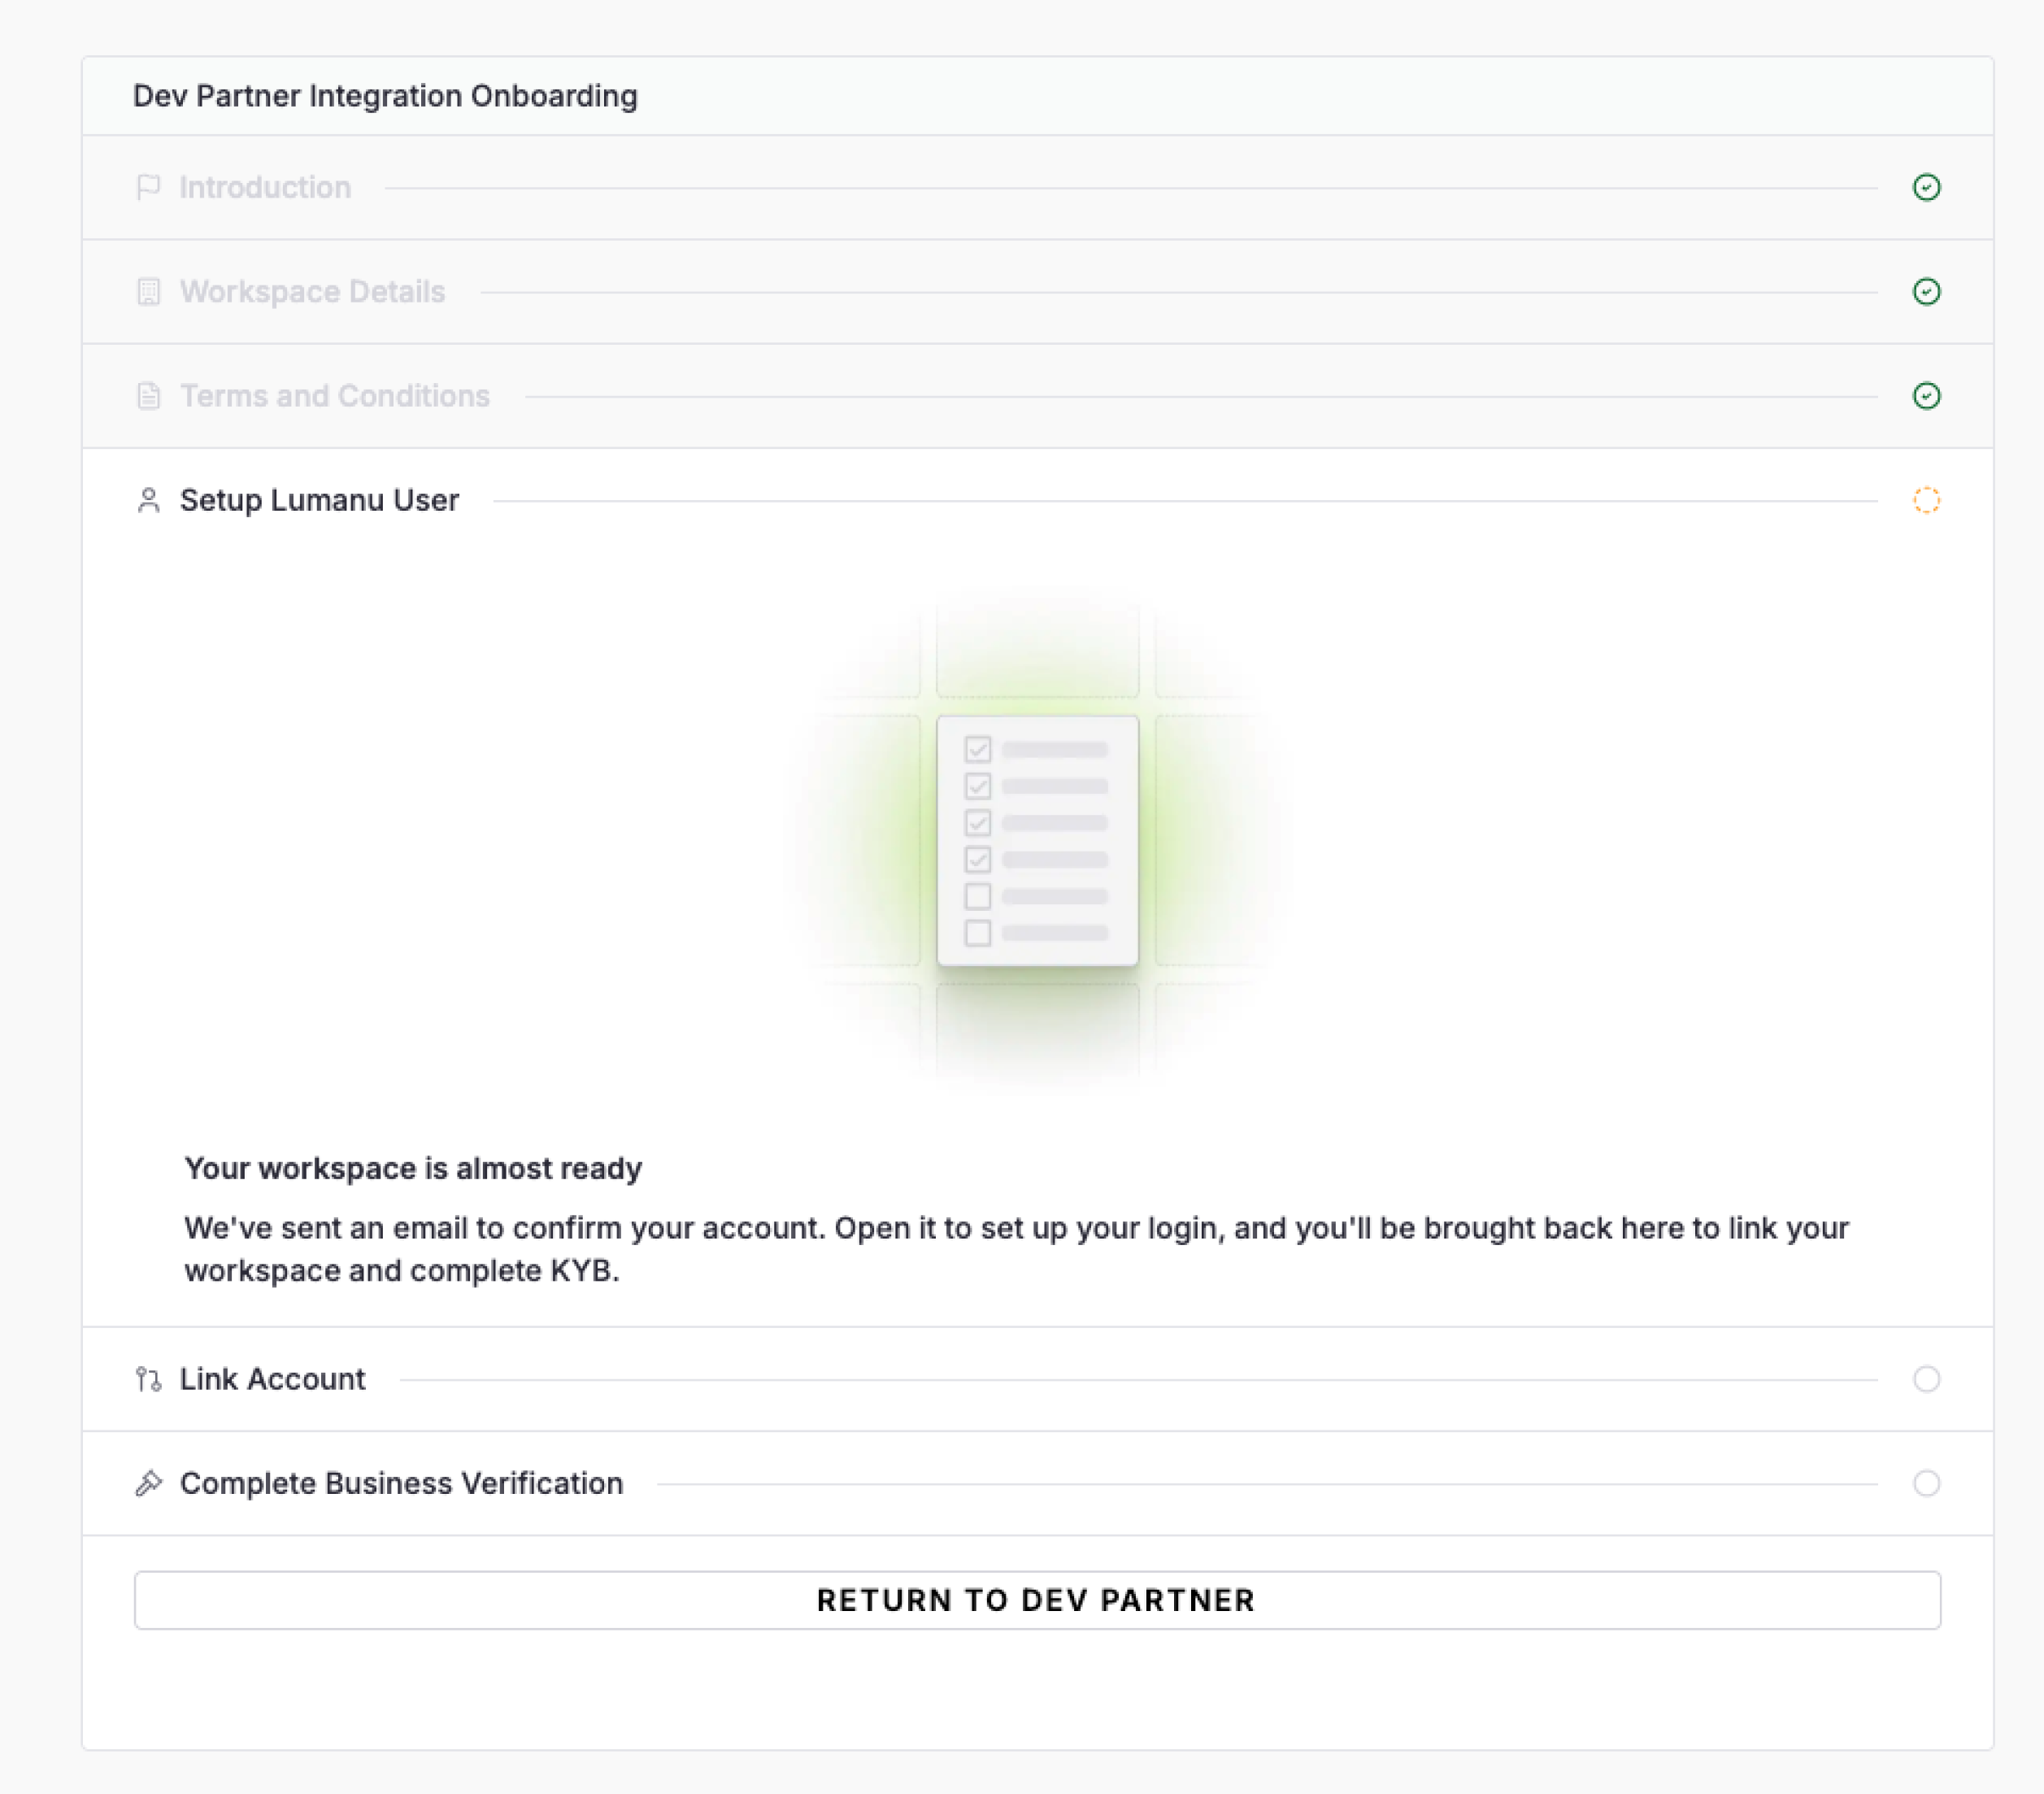
The brand enters the email address and password they'll use to sign in to their Lumanu account.
On Continue, an account-verification email is sent and a confirmation screen tells the brand to check their inbox ("Your workspace is almost ready").
Step 5 — Email Verification and First Login
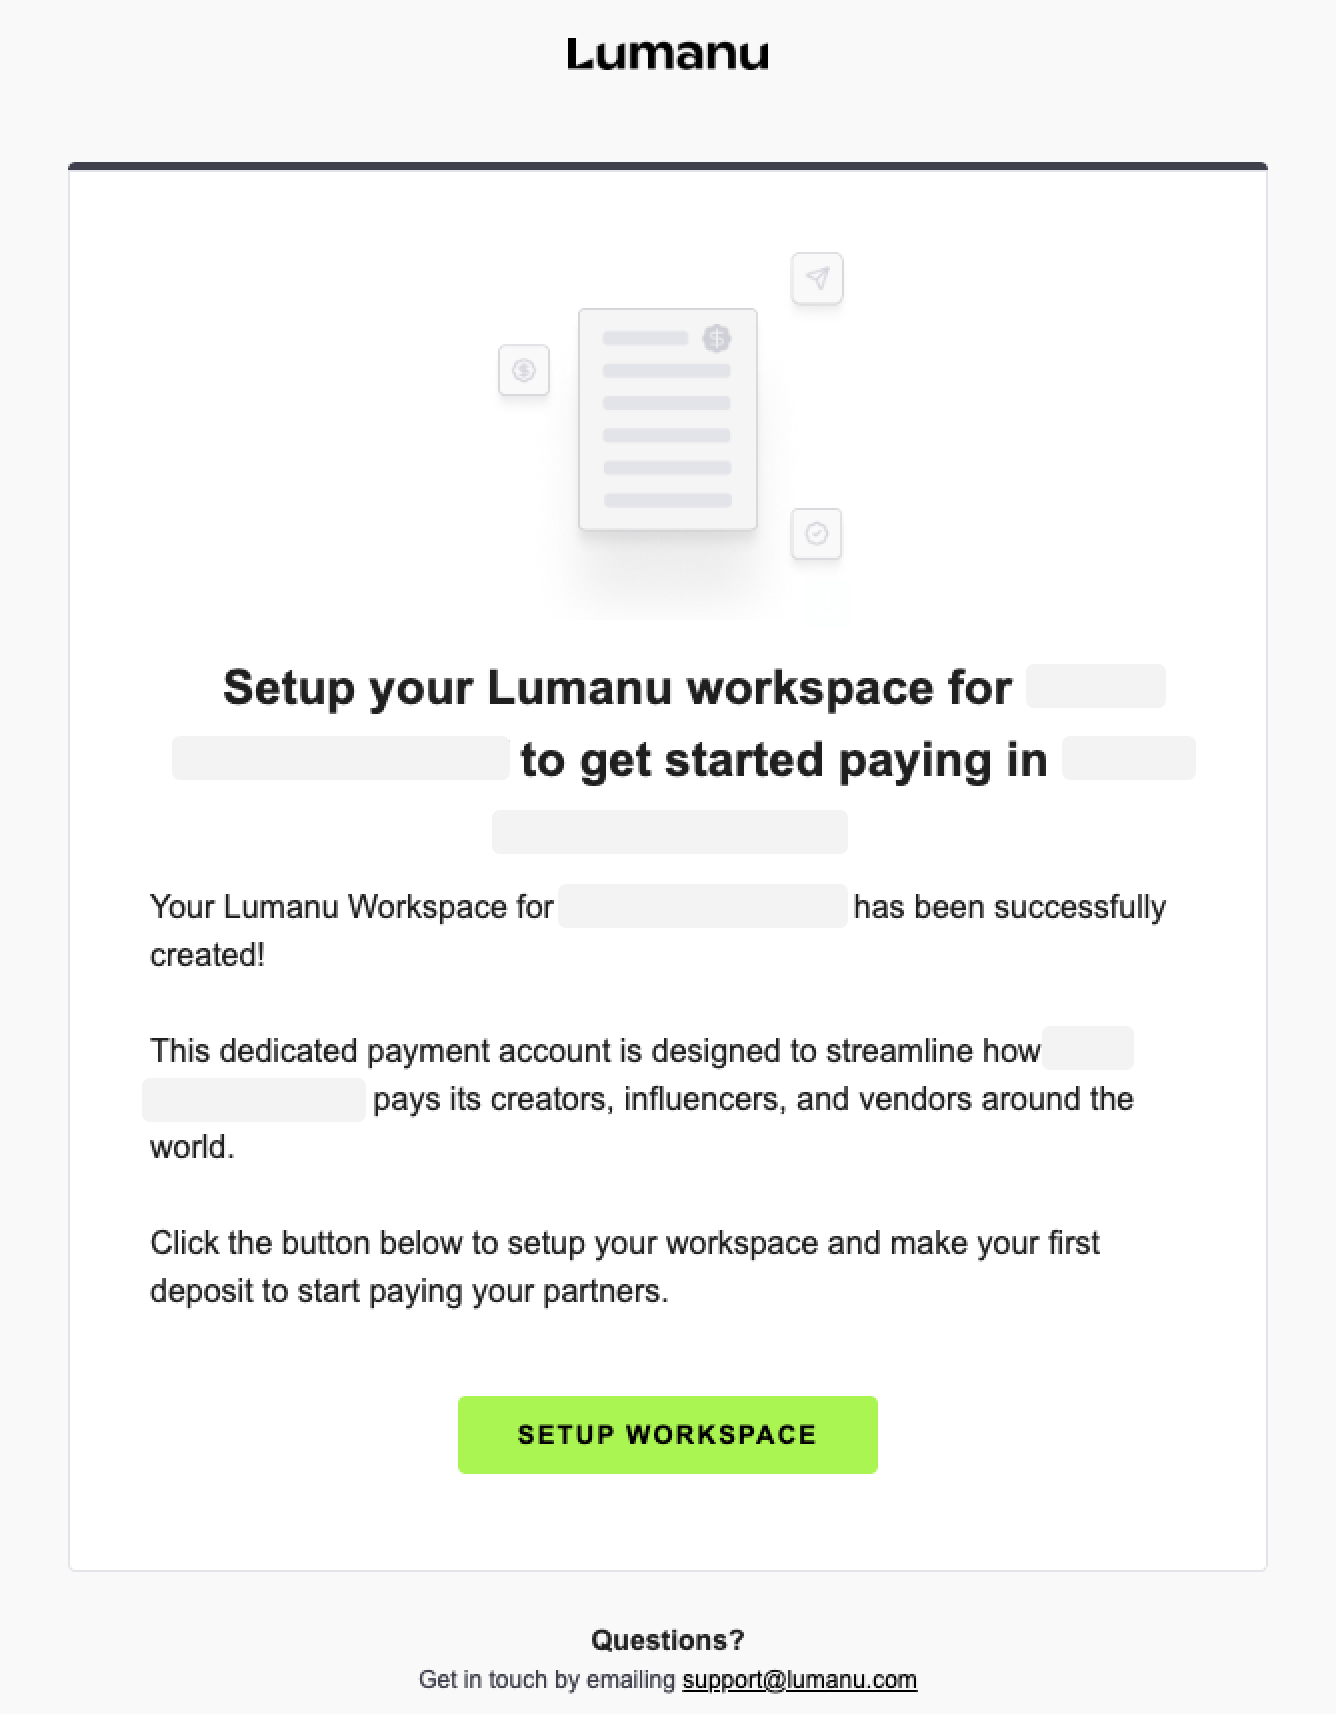
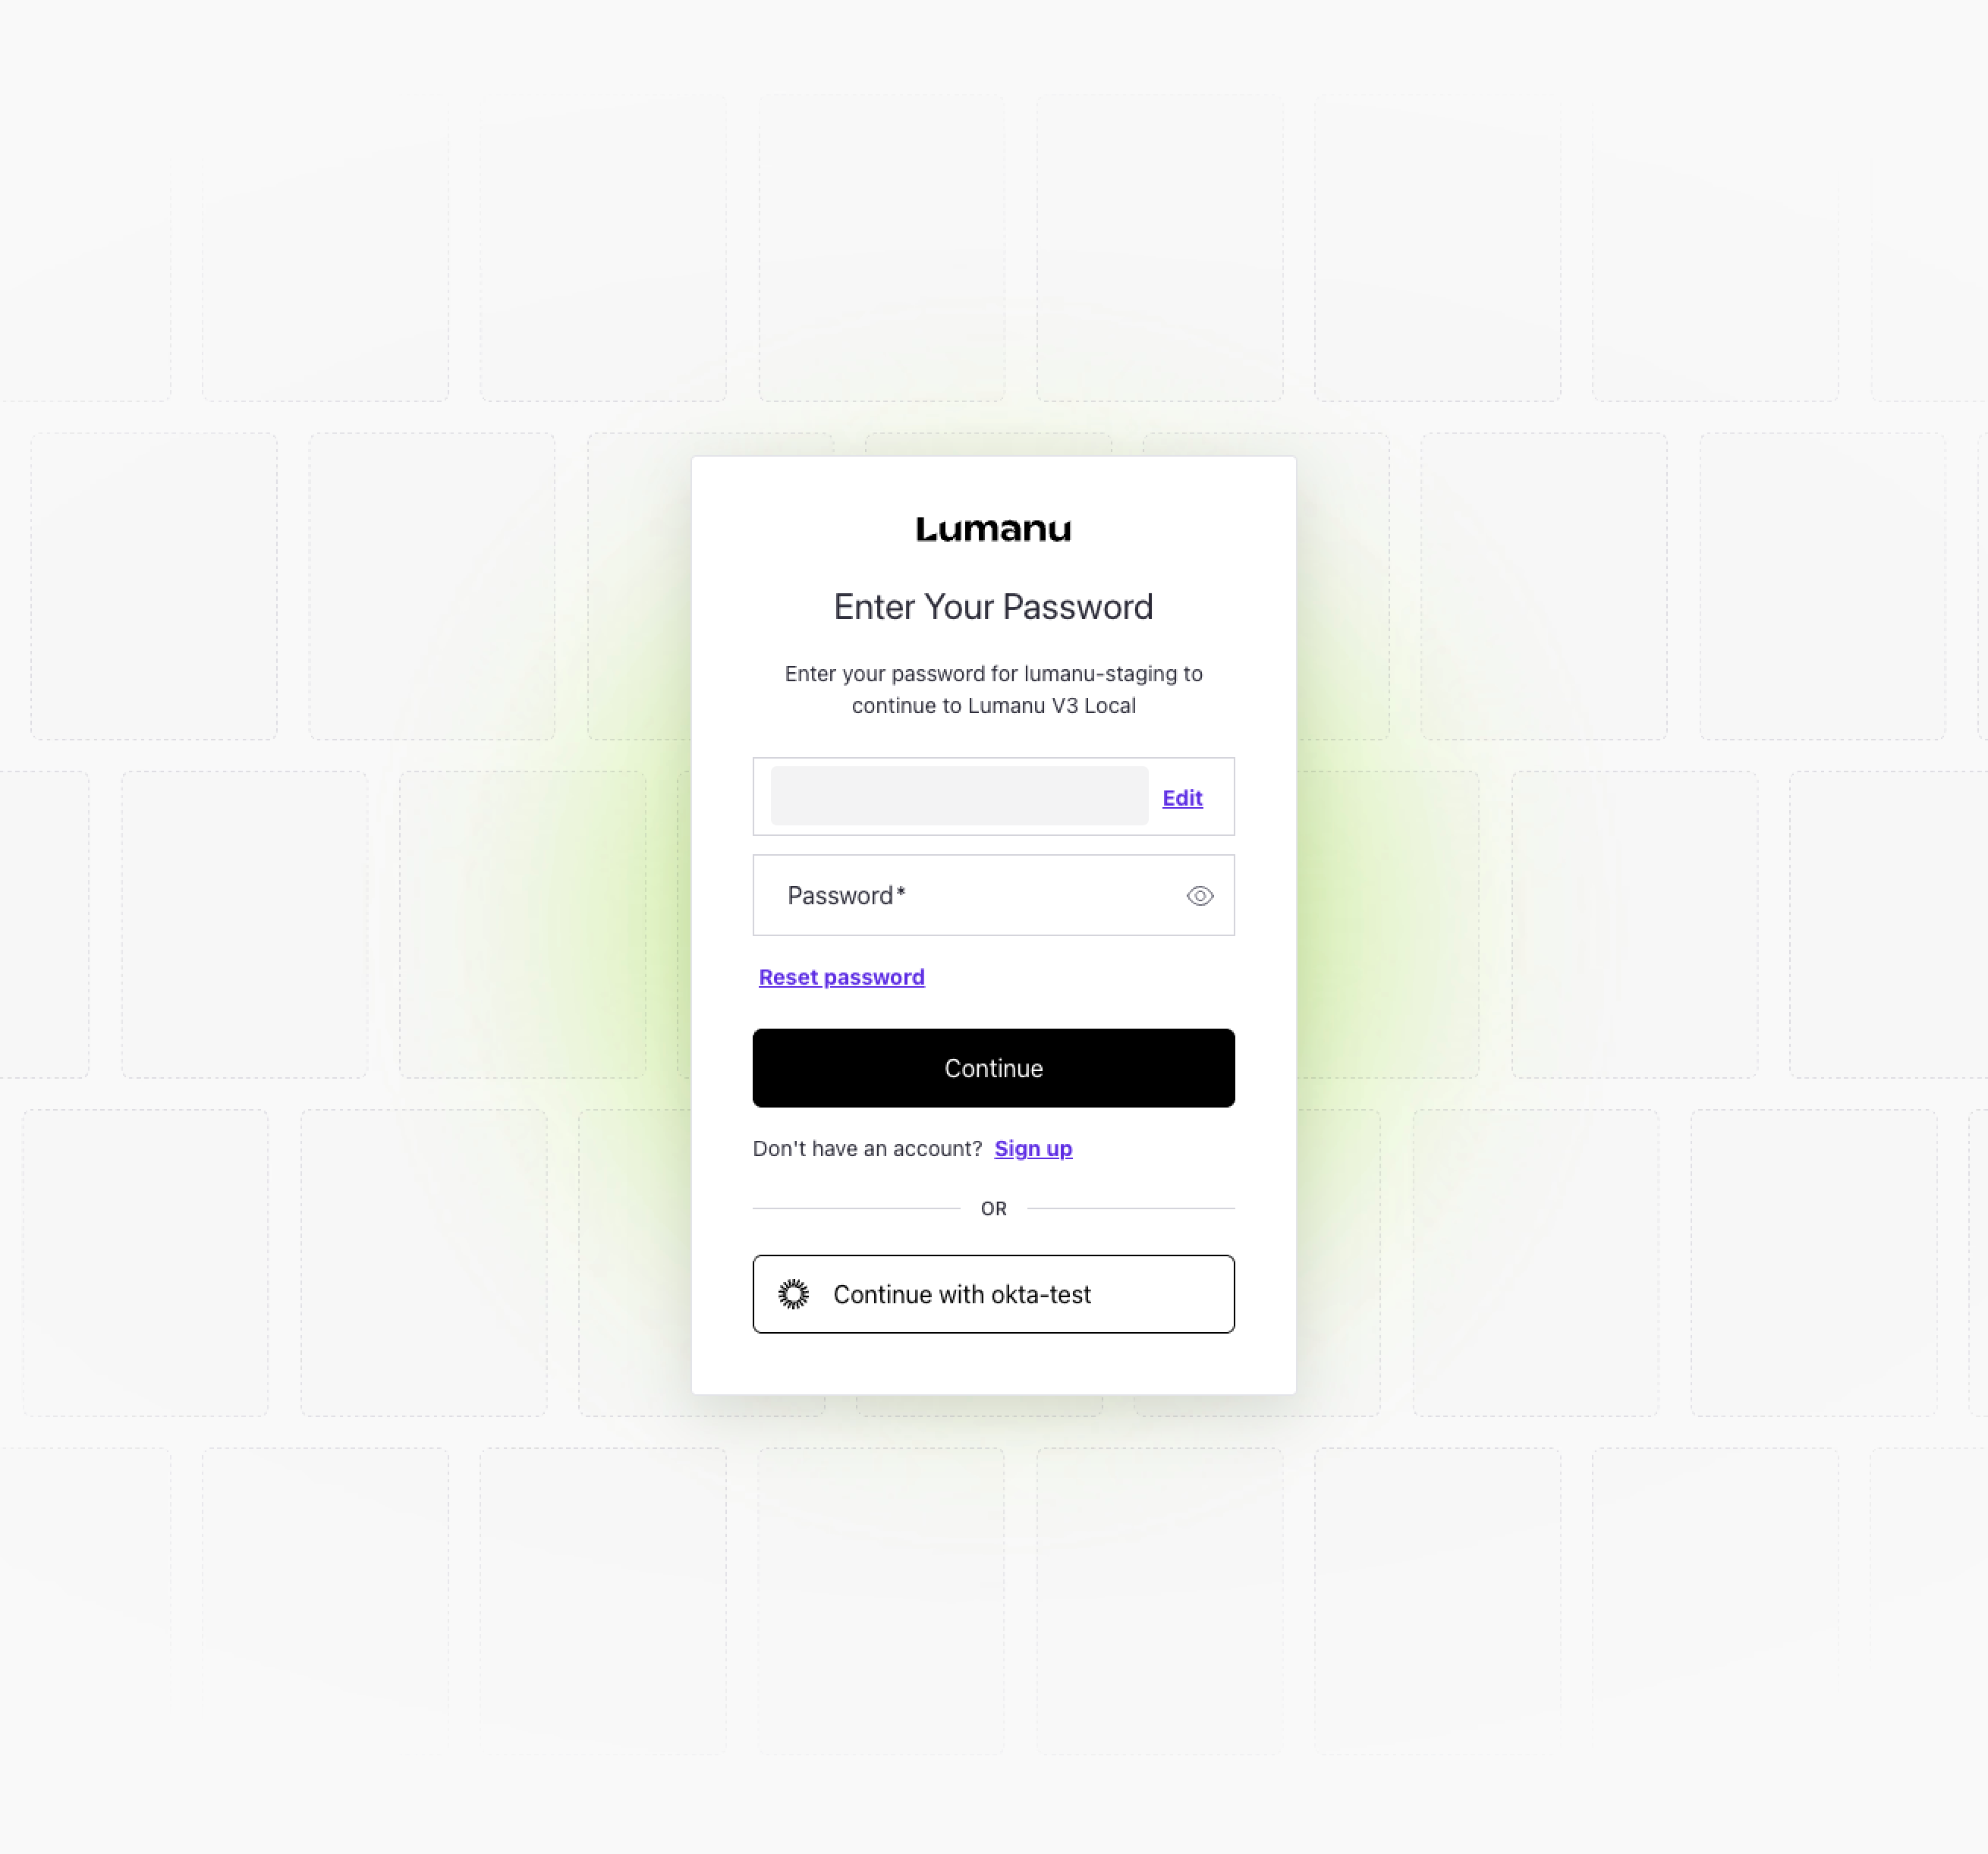
The brand receives a Lumanu email, clicks the verification link, sets their password, and signs in for the first time. They are then routed back into the onboarding flow at the same link.
Step 6 — Link Account and Complete Business Verification
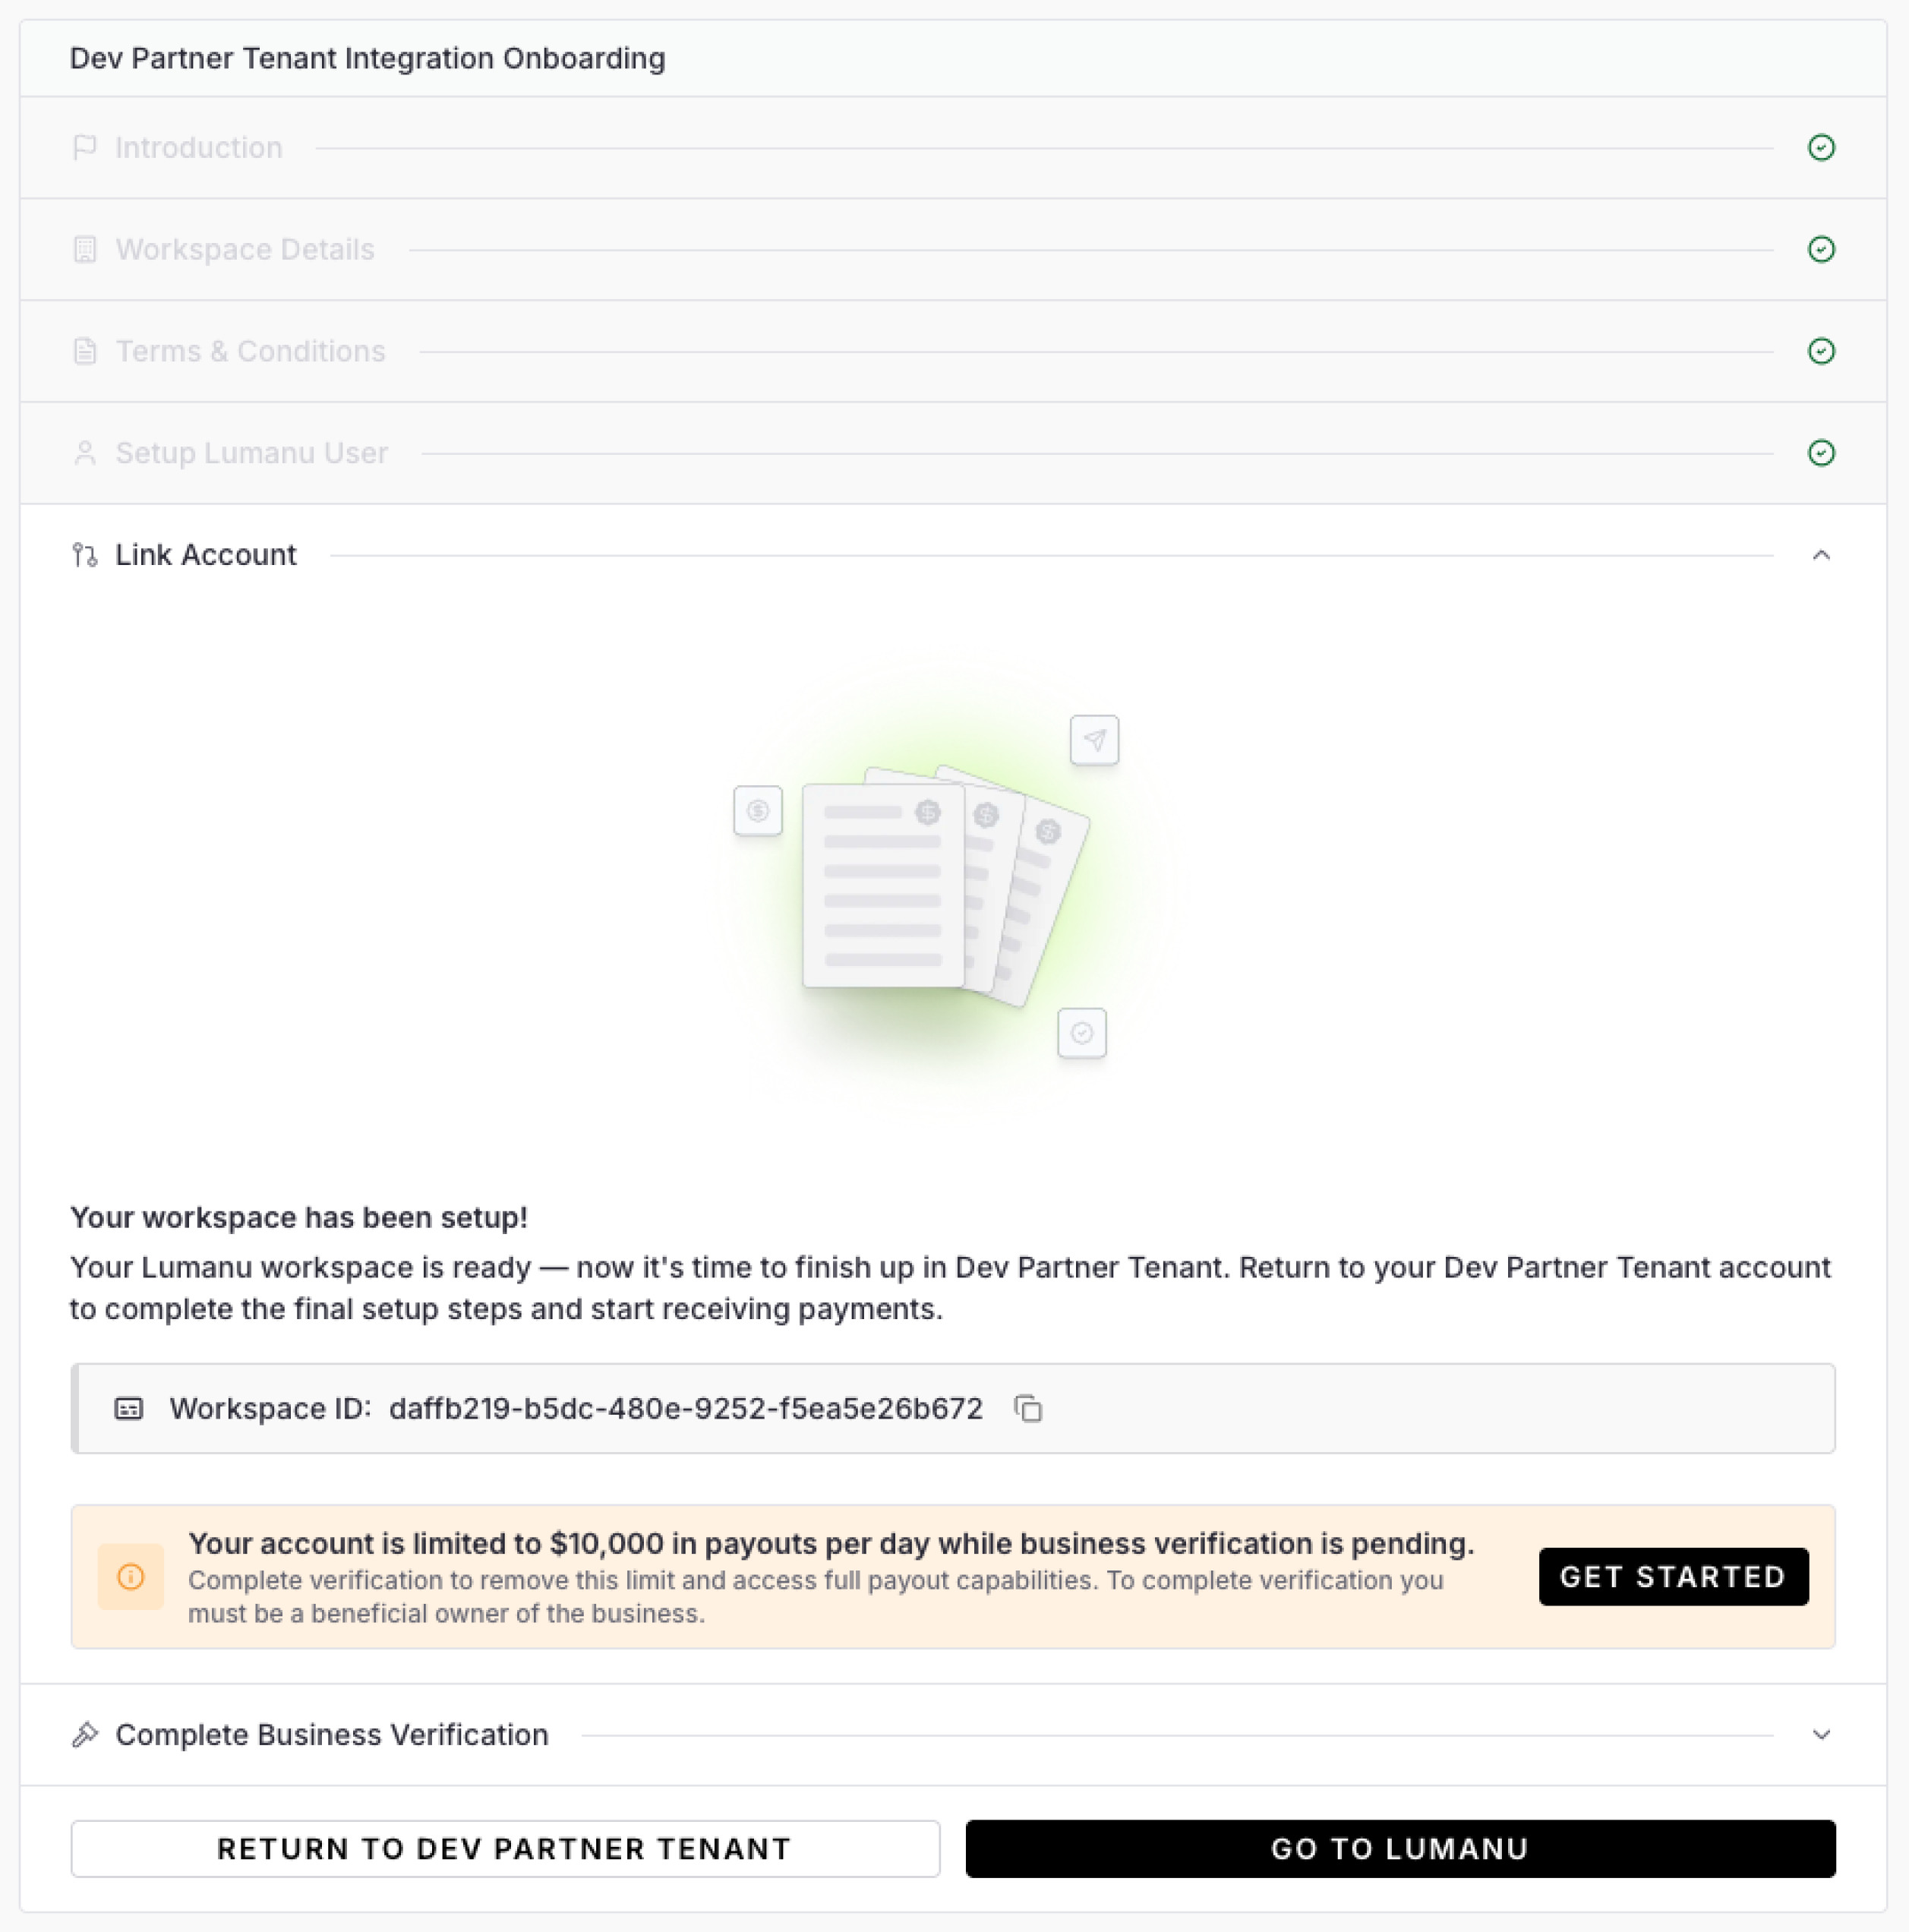
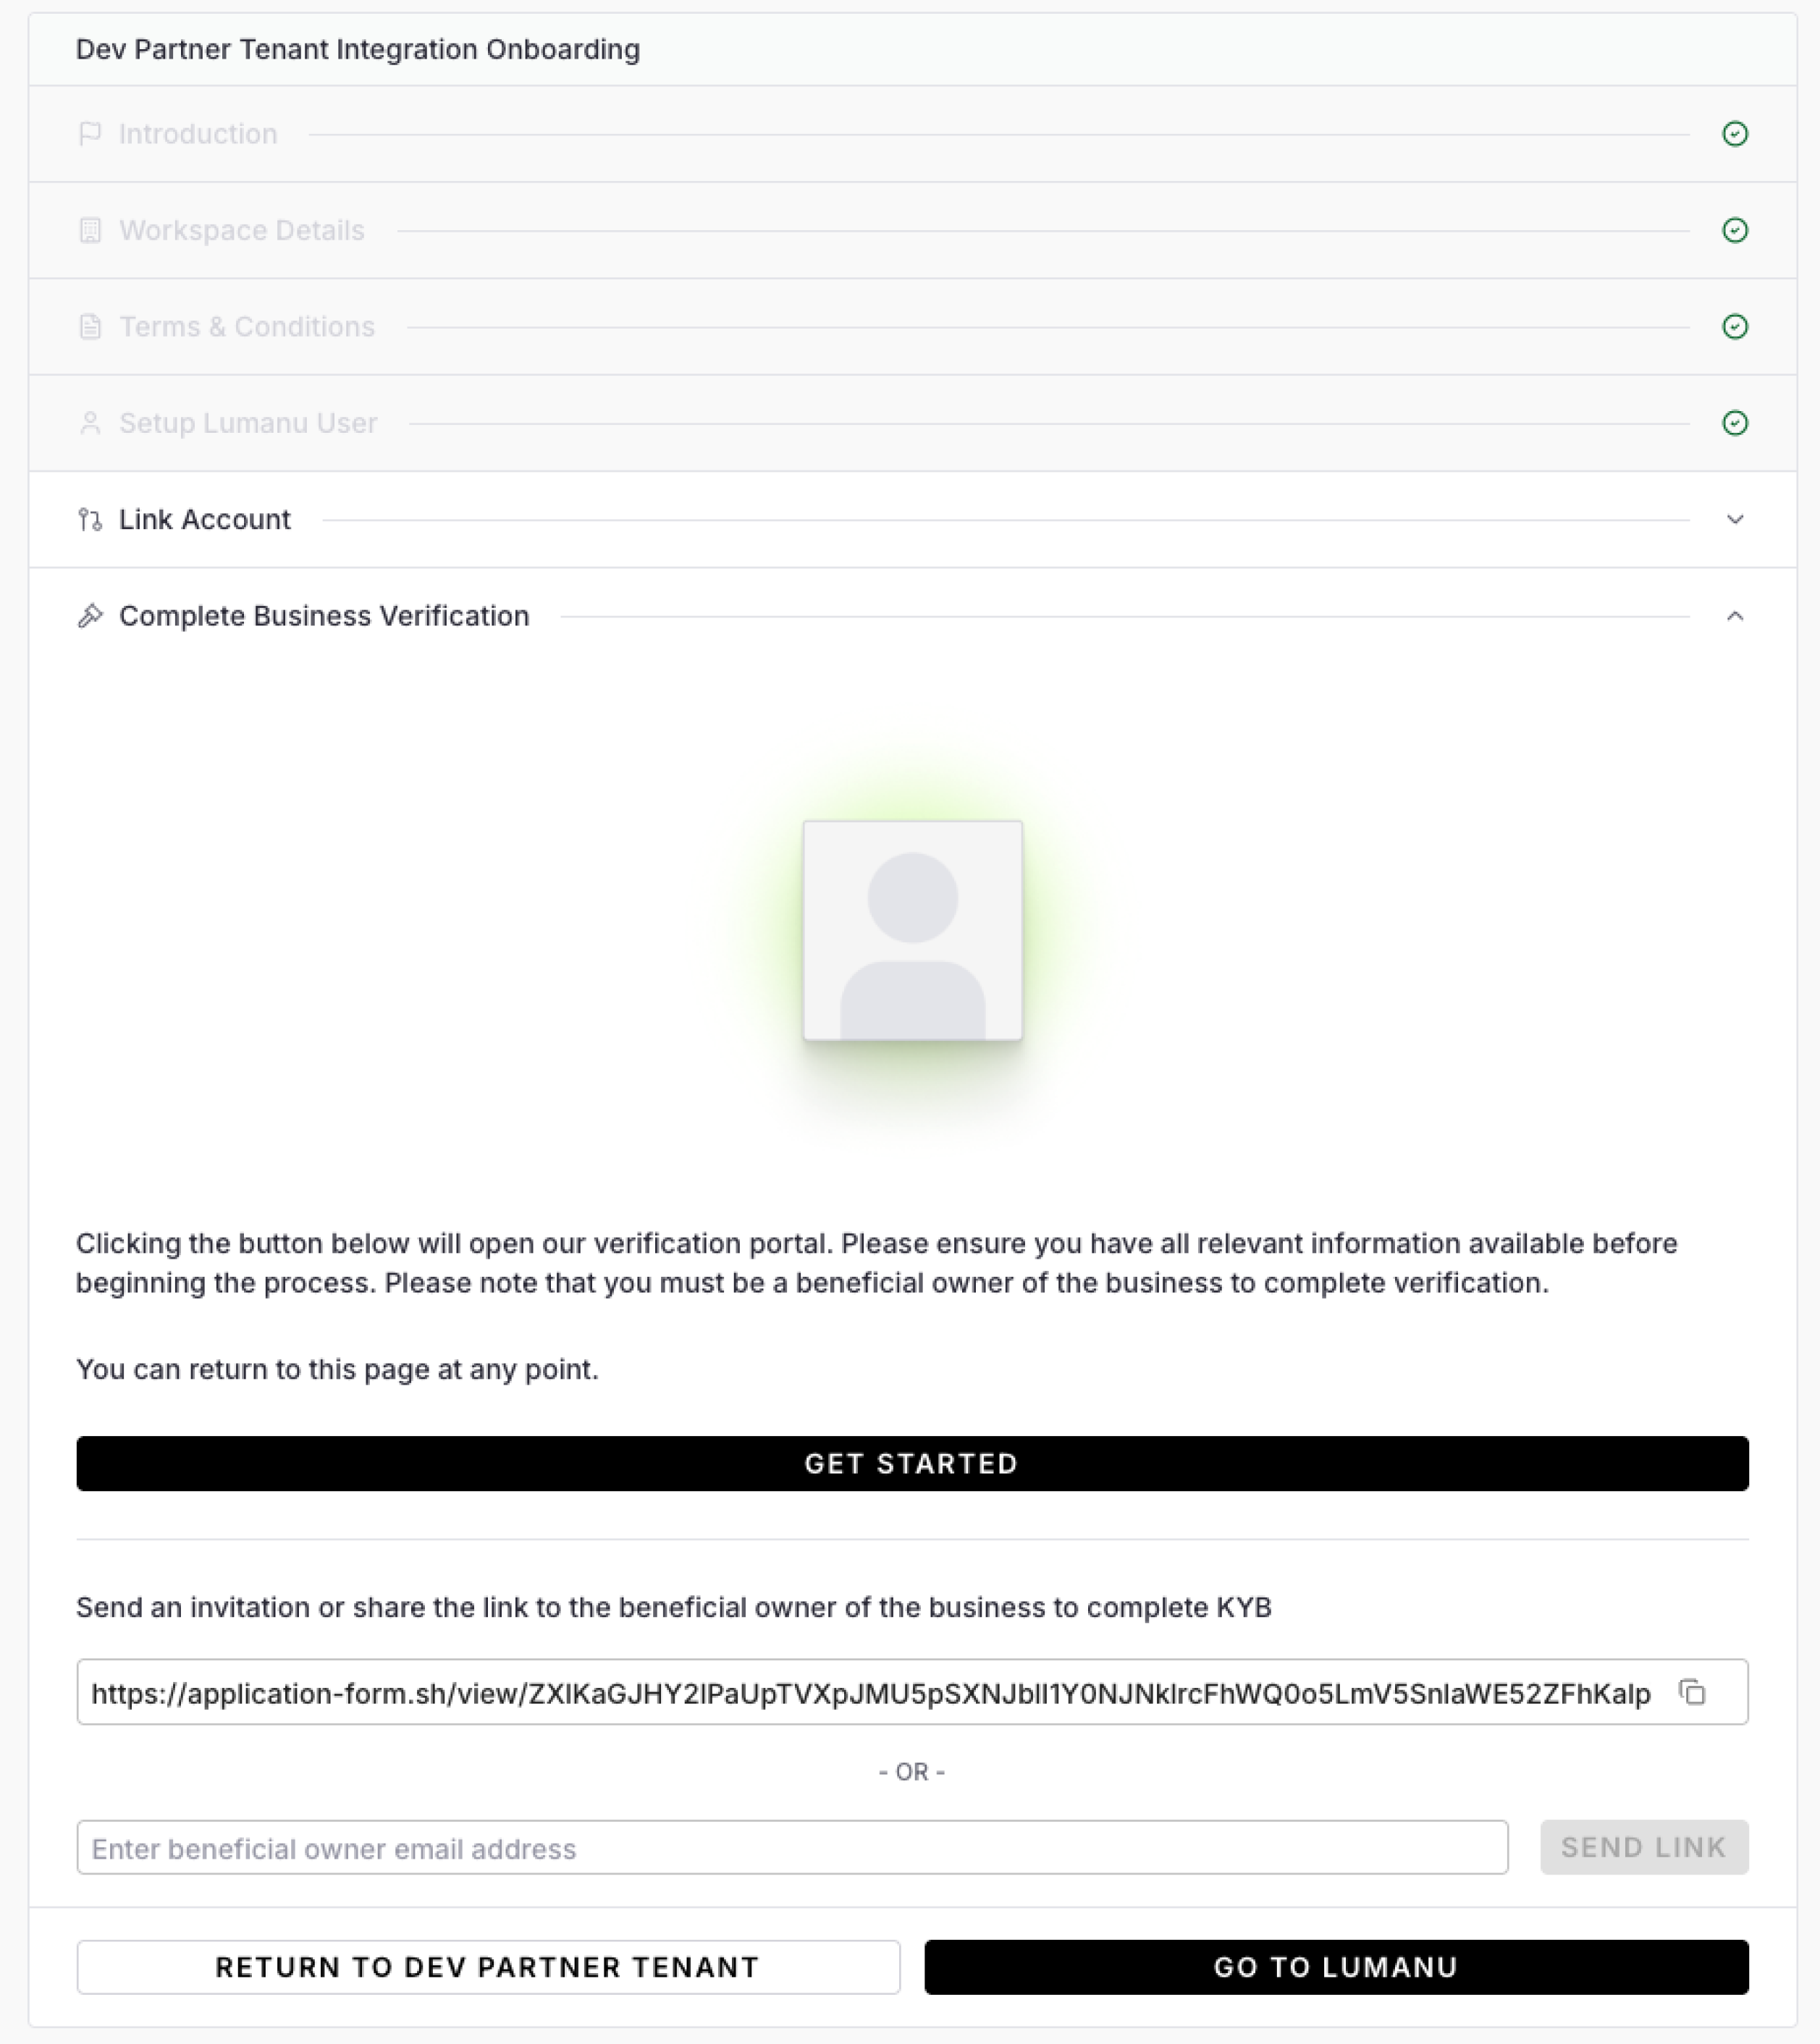
Once signed in, the brand lands back on the onboarding page.
The workspace is liveAt this point the workspace is fully created and usable — the brand can fund and pay immediately. KYB (business verification) is the only outstanding requirement. Full payout capabilities unlock once KYB is complete.
The onboarding link continues to resolve to this page on return visits until KYB is complete, so the brand always has a clear path back to finish verification.
The remaining steps in the stepper are:
- Link Account — tells the brand their workspace is ready, shows their workspace ID with a copy button, and asks them to return to your app to finish setup.
- Complete Business Verification — the KYB flow for the brand's business (business details, beneficial owners, documents), run by Lumanu's verification provider. The brand can complete it in the page, or copy or email a single-use verification link to a beneficial owner who has no Lumanu login.
Until KYB is approved, the workspace is limited to $10,000 in total payouts. The Link Account step shows a banner saying so, with a shortcut to start verification.
Most customers complete KYB the same day, but it may take some a few days if they don't have the required information on hand. If they stop partway, the same link picks up where they left off.
Connecting the workspace to your platform
The workspace is linked to your application as soon as it is created: your application can call the API for it and is subscribed to its webhooks without any further call. Nothing is exchanged between the brand's browser and your platform. To attach the workspace to the right brand account on your side, use either:
-
The
workspace.createdwebhook (recommended). For a workspace created through an onboarding link, the event includes the invite fields next to the workspace ID. Matchidempotency_keyto the key you used when creating the link:{ "id": "6f1c2c0e-3d0b-4a57-9a52-6f0b0f1e8c21", "event_type": "workspace.created", "data": { "id": "75eb2d87-1ce7-4e71-a9af-0c3a63547555", "onboarding_invite_id": "0b6e5c1a-8f3e-4d43-b1a4-5a8e1f7c9d02", "idempotency_key": "customer-4821", "application_id": "a3c1e8f2-6b4d-4f0e-9c7a-2d5b8e1f4a60" } } -
The workspace ID from the brand. The brand can copy it from the Link Account step and paste it into your app, for example on the page your return URL opens.
When the brand's business verification status changes (for example, when it is approved or declined), the workspace emits workspace.updated. Get Workspace doesn't return the verification status yet. Webhooks go to the endpoint configured for your application in the developer dashboard.
Returning Through the Platform Partner App
Brands can also reach their workspace by signing in to Lumanu through the auth flow embedded in your platform app (rather than the onboarding link).
- If the signed-in Lumanu user has one workspace, they go straight into it.
- If the user has multiple workspaces under their email (e.g., they manage several brands, or have onboarded through more than one platform partner), they are prompted to choose which workspace to connect to the current context in your app.
This ensures a single Lumanu identity can cleanly map to the right workspace for the platform partner context they're working in.
Updated about 4 hours ago